
The item you need is plastic-coated wire mesh. It is available at most hardware stores and garden centres. Here is the brand that Michael used to develop his Cossack design.
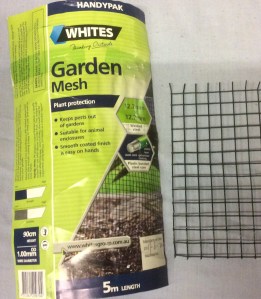
There is sharp wire under the friendly green plastic coating, so you should wear gloves when you start cutting and shaping it into a Cossack.
As well as the plastic-coated wire mesh, you will need:
- protective gloves – I used light gardening gloves which didn’t constrain the fingers.
- wire cutters – for obvious reasons.
- pliers, preferably with a snub nose – to squash down the sharp ends of wire
Cut the mesh to make the sides of the light hat. Now, the exact dimensions are to some extent based on the size of your head. The hat needs to be sitting out from your head, so the dimensions below will seem ridiculously large. It is not meant to be a snug fit. Don’t make a beanie.
It is worth making a paper pattern starting with the figures below, then adjust to suit. For an average head, and producing a hat diameter of around 25cm or 10 inches:
Length of mesh: 85cm or 33.5 inches
Height of mesh: 19cm or 7.5 inches
Make sure that one of the long sides is on a finished edge of the wire mesh, as this makes it so much easier. If both long edges have the bits of sharp wire, it just makes the preparation more tedious.
First join the short edges, to make the sides of the light hat.

Using your gloved fingers or the pliers, twist the wire edges together and use the pliers to squash the ends so that they don’t stick out. You can see that the finished edge of the wire mesh is on the far side of the picture above. The finished edge will be the bottom of the hat, the part that sits over the eyebrows.
Having joined the short ends to make a mesh tube, cut out more mesh to make the top of the hat.

Make sure it is a little larger than your mesh tube.
Start connecting the top to the cut end of the mesh tube. Make sure you are wearing those gloves to stop being scratched.

The photo above shows the work in progress, with the trusty pliers being used to squash the sharp wire ends.
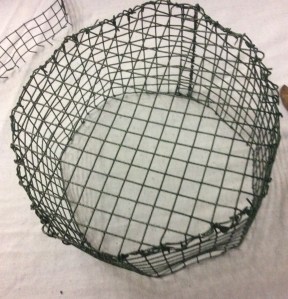
The finished frame is below. Not magnificent, but it is effective. (Ignore the little fragment of mesh on the top left).
If you look at Michael’s finished product, below, attaching the LED strip is so much easier than the bucket model.
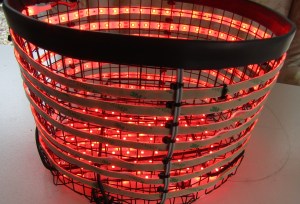
The secret is liberal use of small cable ties.
More to come.

One thought on “Cossack – making the frame”
Comments are closed.